Fore-edge painting prep
Embarking on an endangered art form 😱
Hello all! I’m here to share some updates on the fore-edge painting project. New hobbies are tricky for me to get started on, because I feel the urge to research and over-analyze every element, but I’m slowly learning you just have to have a crack at things sometimes, otherwise you’ll spend forever in the information-paralysis stage…!
At the end of this post I’ve listed the resources that have helped me get this far, should anyone else have an interest in trying this out…even TV interviews are of value in gleaning small details on the process.
Pstttt…I completed the invented reindeer language mentioned in my previous post, it’s called Poro (or, in Finnish, Poron kieli). Take a peek at the other entries if you’re a linguistics nerd like I am, because there are some very fun ideas there.
Now, onto the prep-work. I’m not doing a ‘vanishing’ fore-edge painting yet, because I don’t want to spoil my pre-gilded books, but I’ll be fanning out the pages on my test book exactly like I would with a gilded book.
I did a bit of research into watercolours first, because the current set I have is a very cheap lot (Mont Marte), and I thought it was about time to invest in something I could use for finished works, not just practice pieces.
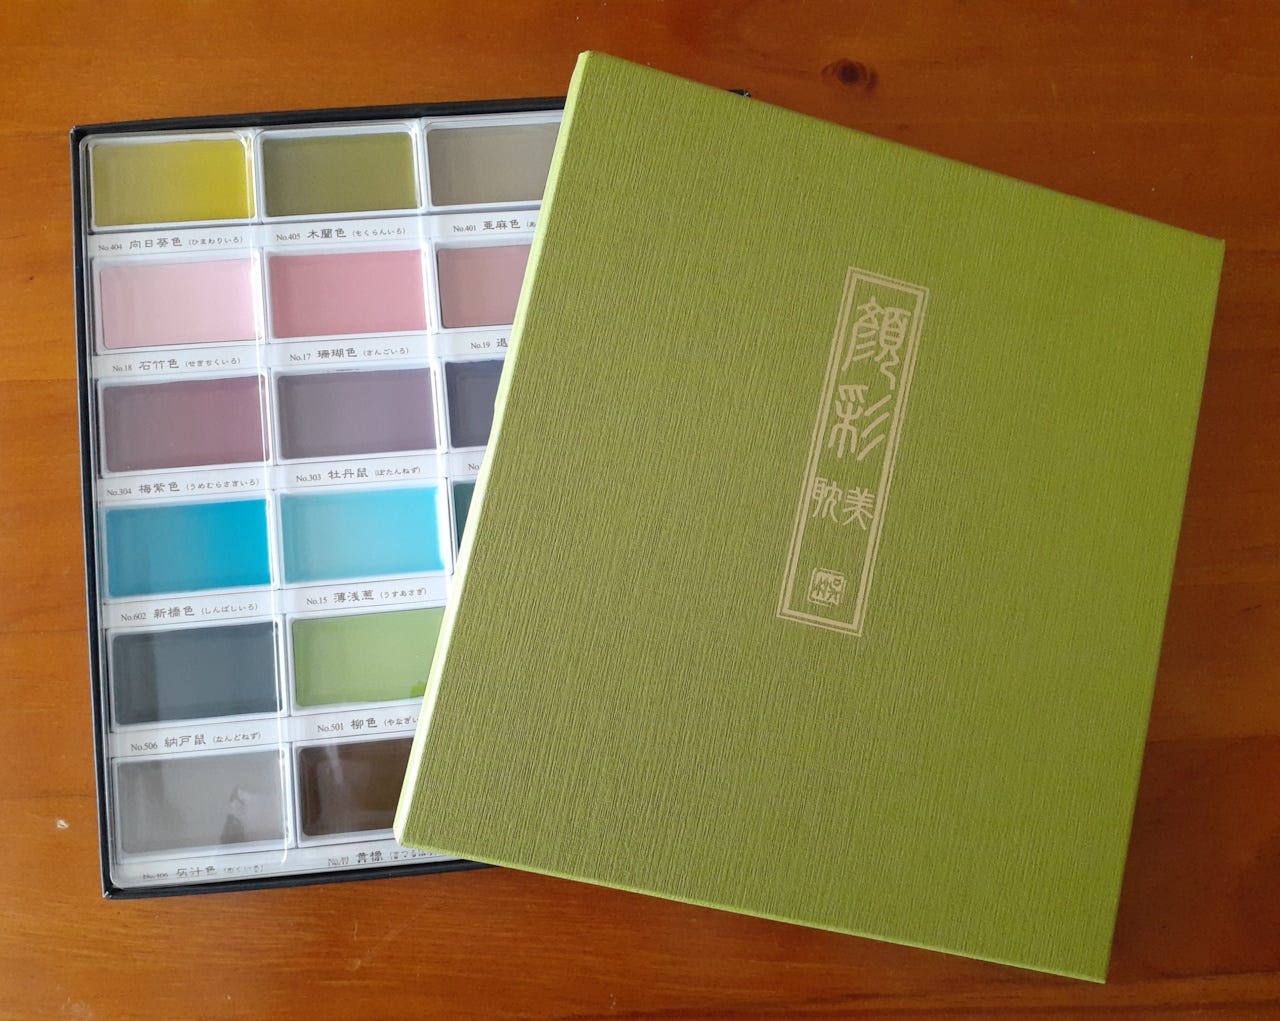
I ended up settling with a lovely set of Japanese calligraphy watercolour paints from Kuretake. The paints arrived last week and the palette colours look very cohesive. It’s the ‘Art Nouveau’ Gansai Tambi set — they’re not exactly watercolour, more like gouache, so they’re quite opaque and it takes a lot to water them down. I think this will suit me nicely, since fore-edge painting needs to use as little water as possible to avoid buckling the pages, so I’m really hoping it’ll keep my colours vibrant even if I thin them out a bit with water.
However, this really is an untested theory so…updates to follow, I guess!
I already had some student-level brushes, so I was all set there, but I was getting sick of my plastic palette, you can never get the paint stains out and it just feels…tacky.
However, it turns out that you’re better off using ceramic anyway. I fell in love with a cute little ceramic palette that I saw online and I really wanted one…but alas, the ones on Etsy were beyond my budget. So, after a prayer to St Anthony, I hunted through some thrift stores till I found two dear leaf-shaped ceramic dishes. They’re not really palettes but they’ll do very nicely; the paint can sit in the grooves and I can mix between grooves.
So it can be done on a budget, folks. ;)
Now we come to getting the book in position. There is a surprising lack of historical instructional literature on fore-edge painting, and very little on the niceties of the process. Back in the day, the usual method would be to receive this instruction from one’s artisan master, not a tutorial book!
I’ve watched all of Martin Frost’s videos, and tried to get an idea of how he teases the front corners of a book to get an evenly slanted fore-edge surface. I’ve seen others on YouTube do it differently, too, pulling the book back from the spine. It’s surprisingly fiddly to get the book clamped without any of the pages slipping on you. The paper makes a real difference as well. (Modern paper is often cut in the wrong grain direction, thus changing which way it flexes and actually making it harder to bend/turn the pages.)
For the first ‘practice run’, I’m using a little pocket dictionary that I picked up from an op-shop, something that I won’t stress over ruining.
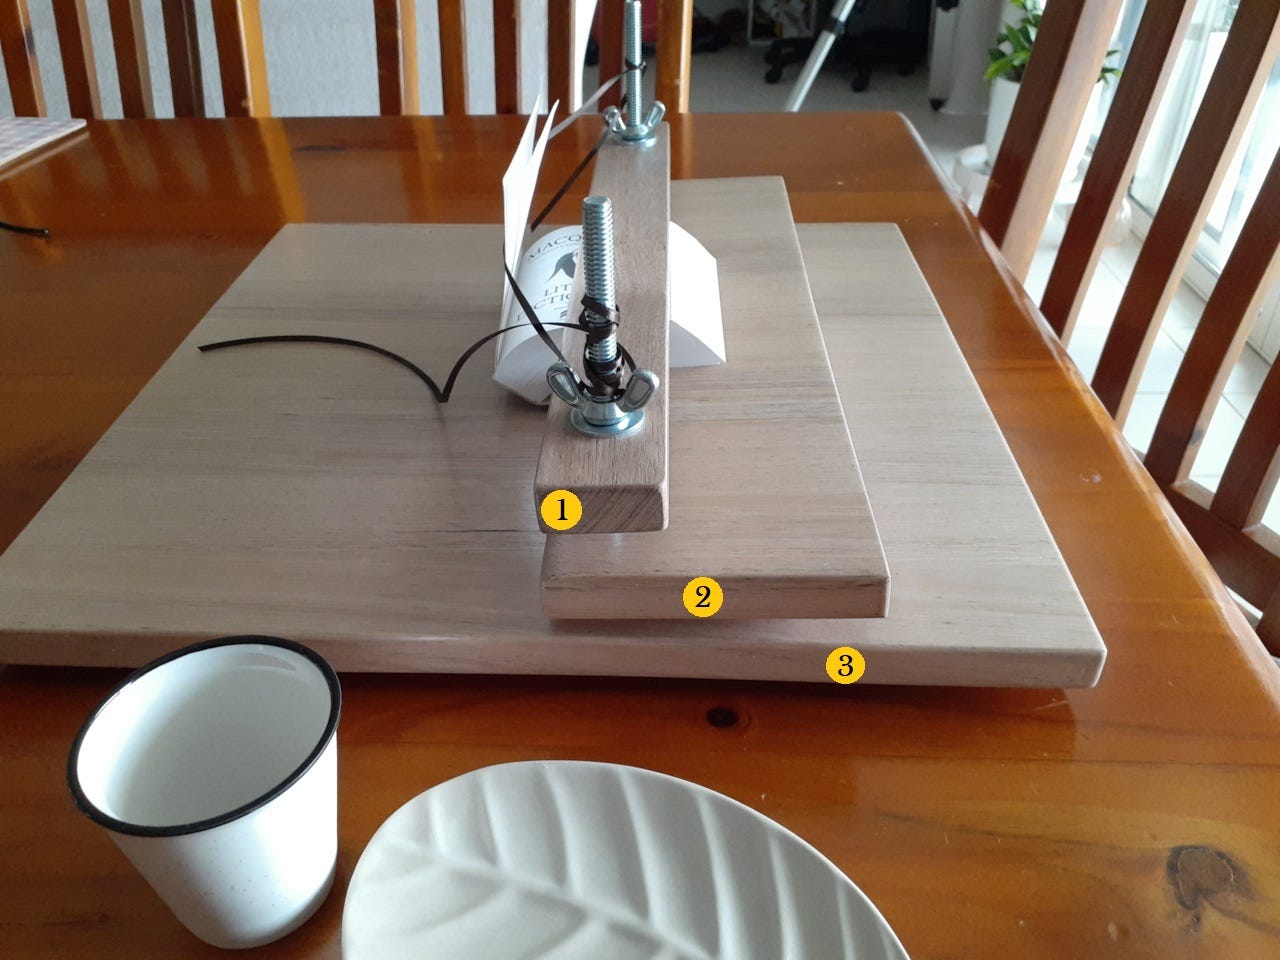
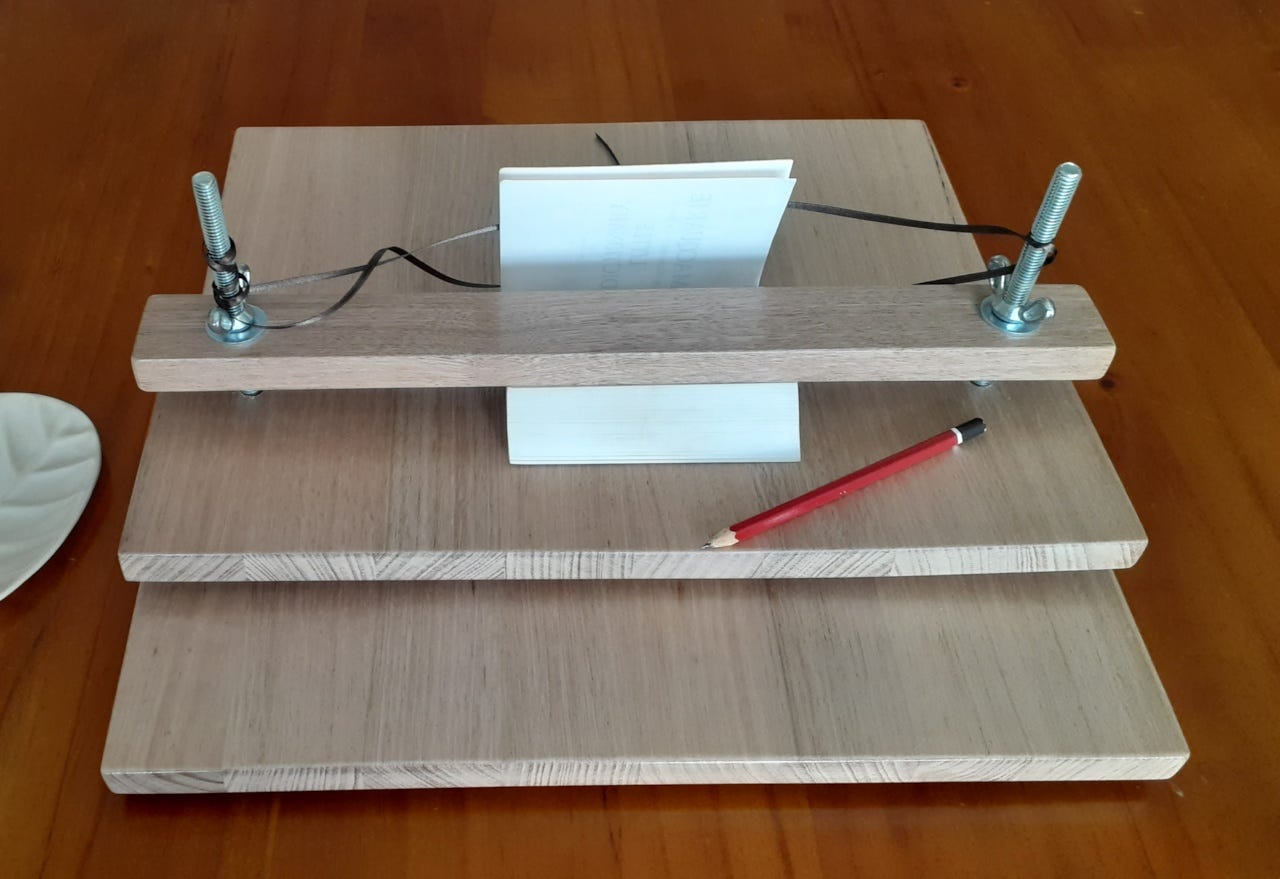
So: the fanned pages go between (1) and (2), the back cover goes under the middle piece — between (2) and (3) — and the front cover (and any frontispiece or other pages glued to it) just fall back. Make sure your pages haven’t slipped out of position before you clamp down the top piece of wood (1).
It’s recommended to tie a piece of string or ribbon across your two clamps (I’ve attached a ribbon to the bolts) to support the front cover, so that the cover doesn’t stretch back too far and damage the spine (some book covers can be quite weighty).
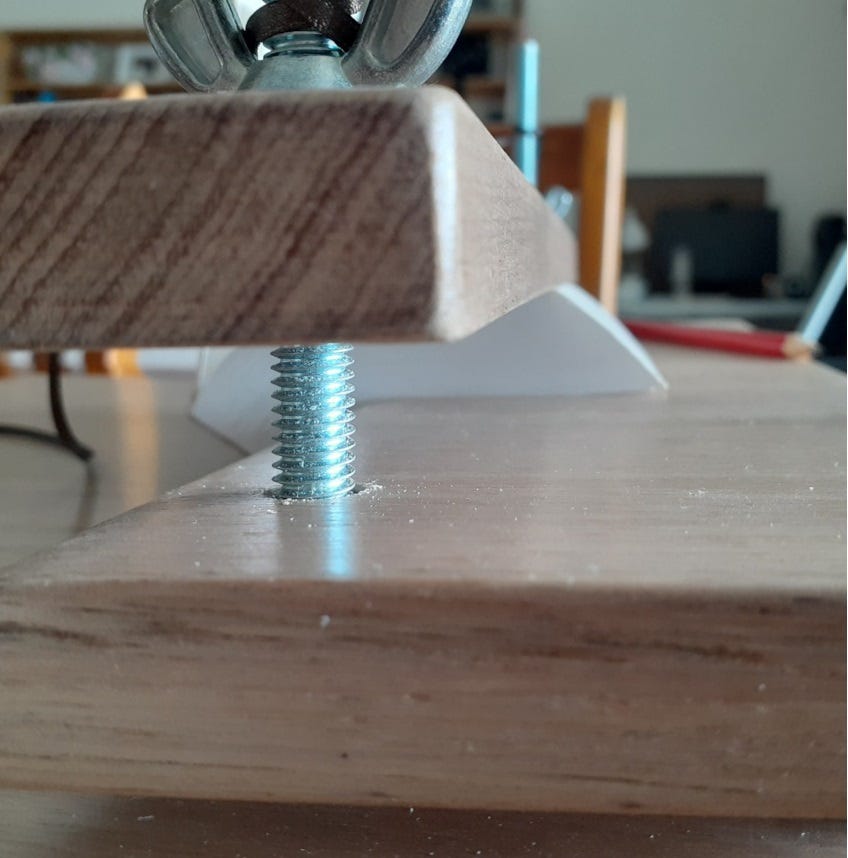
Here’s what the book’s surface looks like from side-on. It’s easier to see there the sloped surface of the fanned book, and the way the book curls back to allow this.
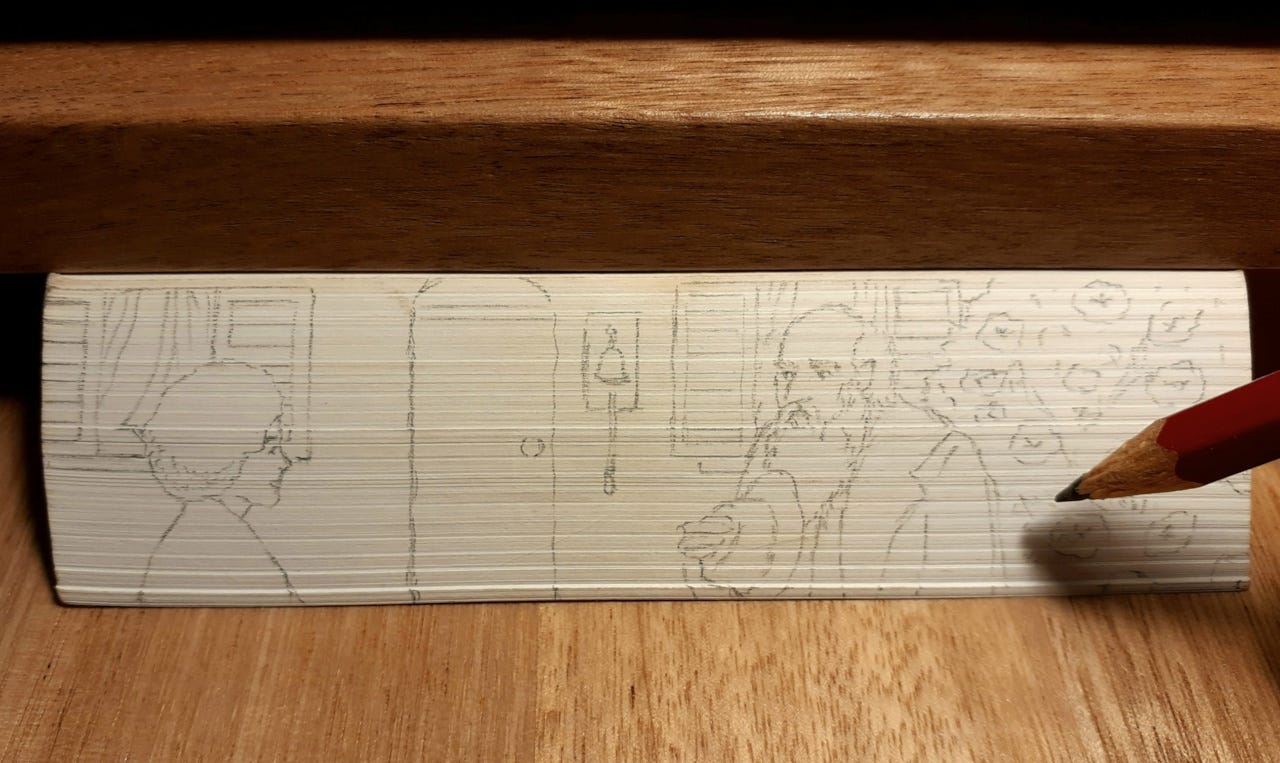
Now it’s time to lay down a pencil sketch (and do it lightly, because it’s difficult to erase pencil once it’s been painted over). Because the book I’m using isn’t gilded, I ran a kneadable eraser over the book surface first, to remove any grime and marks. I was stumped for a particular subject to draw so I just started sketching a curly-haired girl and an old man and filled in a bit of background.
Alas, as you might be able to see above, some of the bottom pages are jutting out a bit, meaning I’ll get a line of paint on the inside edge of a page, rather than just the fore-edge. 🥲
The pages evidently slipped a bit when putting the book into the press. Oh well. I suppose it’s one of those things you learn naturally after experimenting with it a bit.
Important notes: Martin always uses a clear strip of perspex or a ruler set against the top edge of his press, perpendicular to the book. He rests his hand on the ruler so he doesn’t touch the paper — oil from human hands isn’t good for any surface that you’re trying to paint or draw on!
Secondly, always paint/draw on a fore-edge in a downward or gentle ‘laying’ motion…this is crucial when you get to the painting stage, as an upward motion will result in the brush/pencil tip sliding between the pages and — disaster! — you’ll get a nasty mark or even worse, a big paint bleed into the pages.
So there you have it. The little dictionary is ready for painting (the scary part!). You’ll be sure to see the results here.
Martin has an hour-long lecture, ‘Disappearing Art: The History and Craftsmanship of the Vanishing Fore-edge with Martin Frost’, which is available for $10 USD from the American Bookbinders Museum website. (The internet is amazing, isn’t it?) I am sure I’ll be returning to it multiple times to glean all his tips.
Thank you for following me on this foray into the wonderful world of fore-edge painting. Let’s keep the knowledge of this beautiful craft alive!
xx The Inky Baroness
Resources I’ve found and used so far:
'Disappearing Art' (lecture by Martin Frost, purchasable from the American Bookbinders Museum)
How Fore-Edge paintings are done - a masterclass (Martin Frost)
Fore Edge Painting Artist Press (very helpful in designing/building your own)
The Illustrated Fore-edge - a concise, insightful article that covers the do’s and don’ts
Fantastically Fast Fore-edge Painting by Stephen Bowers (on unbound book)
Color Mixing With Kuretake Art Nouveau Set + Botanical painting
‘Fore-edge painting: A historical survey of a curious art in book decoration’ by Carl Jefferson Weber (Internet Archive scanned book) - Chapter XIII: ‘Technique’
Apparently Jeanne Bennett’s book, ‘Hidden Treasures: The History and Technique of Fore-edge Painting’, has detailed instructions on how to build your own press, and I will certainly have to read it (if I can ever afford the steep price tag, goodness gracious).
Facebook recording of a live-streamed session with the marvellously talented Maisie Matilda Jackson and, of course, Martin Frost (it’s on Facebook, which I don’t have, but helpful Redditors had ways and means of downloading FB videos. The video is out of sync with the sound so a bit of editing was required to clean it up.)



So excited to see how this goes! Thank you also for sharing the resources...it looks so cool and your posts make me want to go out on a limb and try the process eventually, too!
I can't wait to see how this turns out!